Pages

Showing posts with label Refurbished Furniture. Show all posts

Tuesday, November 27, 2012

A Refurbished Ladies Chair


This intricate crest belongs to a dainty little ladies chair. It is so small that by our standards we would think of it as a youth's chair.  But then people are a lot bigger now then they used to be!  Now it is just the right size for an occasional bedroom chair  or for sitting in when you are putting your shoes on.  

The chair came to us with broken cane on the back.  Enough was broken that we really couldn't repair it, we needed to completely replace it.  It was woven with a 'blind cane' method, so the holes that the cane goes into don't go all the way through to the back.  This is much more challenging then regular hand cane.  Once the cane work was done, the 'blonde' looking natural cane needed to be colored to better blend in with the chair.

We also refurbished the chair.  This means that we refreshed the existing finish rather then applying a new one.  Depending on the method used, refurbishing isn't always a job that requires high levels of skill, but it does require high levels of labor.  For this chair we chose a wax color that would fill in where the old finish color had worn off.  This wax is applied by hand, left to dry, and then polished by hand.  This polishing process is quite labor intensive and not for the weak of elbow.  And in addition, this chair has so many little nooks and crannies that the polishing task was bumped up several notches in difficulty.  No one wants a glob of wax stuck in one of those pretty carved leaves!


Wednesday, June 13, 2012

Secret Finish On An Old Rocking Chair

The owner of this rocker came in with the intention of having it stripped and refinished. This is an example of one of the rare instances where we do our best to persuade the customer to take a different approach. The alligatored finish on the seat of this chair is not a worn out aged finish, but a very intentional decorative design. She was easily persuaded  to save the original, and we simply cleaned waxed, and polished the chair.
While the chair looks beautiful, and we were clearly able to preserve the finish,  the customer really just didn't feel happy with the black.  So she brought it back to us to see if there was anything else we could do to keep the chair's historic quality, but not have the chair black anymore.   

We could see a little bit of a greenish color under the black, and where the black was more worn, we could see little areas of green.  So we decided to try and remove just the black by scrubbing by hand, without having to put it through the stripping system, which would have removed everything!  Once we got below the black layer, we could see a beautiful old green painted finish appear, and a very cool red 'alligator' painted finish on the seat.   What also emerged was some striping over the green paint, and what looks to be an old decal on the center of the back.   Once we successfully removed all of the black coating, we cleaned the rocking chair and then proceeded to wax and polish it.    Waxing and polishing is very labor intensive work, especially on a piece such as this with all those spindles and stretchers.  But, it really is the best way to make an old finish look beautiful again, while still preserving the historical value of the piece. 

The chair really looks beautiful now, and we have succeeded in making our customer happy.  We retained the original historical value of the rocking chair, while getting rid of the black she so disliked.  Of course,  this chair's own unique history helped us achieve that aim.  Without that beautiful green and red layer hiding under the black coating, we would not have been able to accomplish our goal. 

Tuesday, April 24, 2012

Refurbished Music Cabinet

 At first glance, it looks as though this music cabinet has some fancy faux finish work on the front.  But on second glance, we noticed that the door front used to have a raised trim, which at some point had fallen, or been taken off.  This left a lighter decorative area where the stain had never ben applied.  It makes for a very interesting effect.

The cabinet also had considerable damage to the top surface, to repair that damage, we stripped the old finish off and completely refinished it.  As you can see from the photo to the left, the top now looks gorgeous.  The rest of the cabinet received some minor structural repairs,  and a very thorough refurbish job.

When we refurbish a piece of furniture, we begin by cleaning the piece with a mild soapy detergent.  This gets any dirt, grime and oils off the wood.  Also, if any of the old finish is going to flake off sometime down the road, this procedure removes that weak finish.   Once the piece is clean, we can assess to see if any additional color needs to be applied where weak finish may have come off.    We then will wax and polish the entire piece.  While this is not technically difficult work to accomplish,  it is really a workout!  If you tried to tackle waxing and polishing yourself you probably wouldn't have to go to the gym that day, you would have gotten all the exercise you need while working on your furniture!   One of the nice things about refurbishing vs, refinishing is that you get a nice satiny finish, but still have the character of the dents and scrapes and history, in tact.  Not everyone wants that, but if you don't want to change the color, and you don't mind seeing 'character' then refurbishing  may be the way to go for your furniture.

Friday, September 30, 2011

A Little Oil and Wax Go A Long Way!

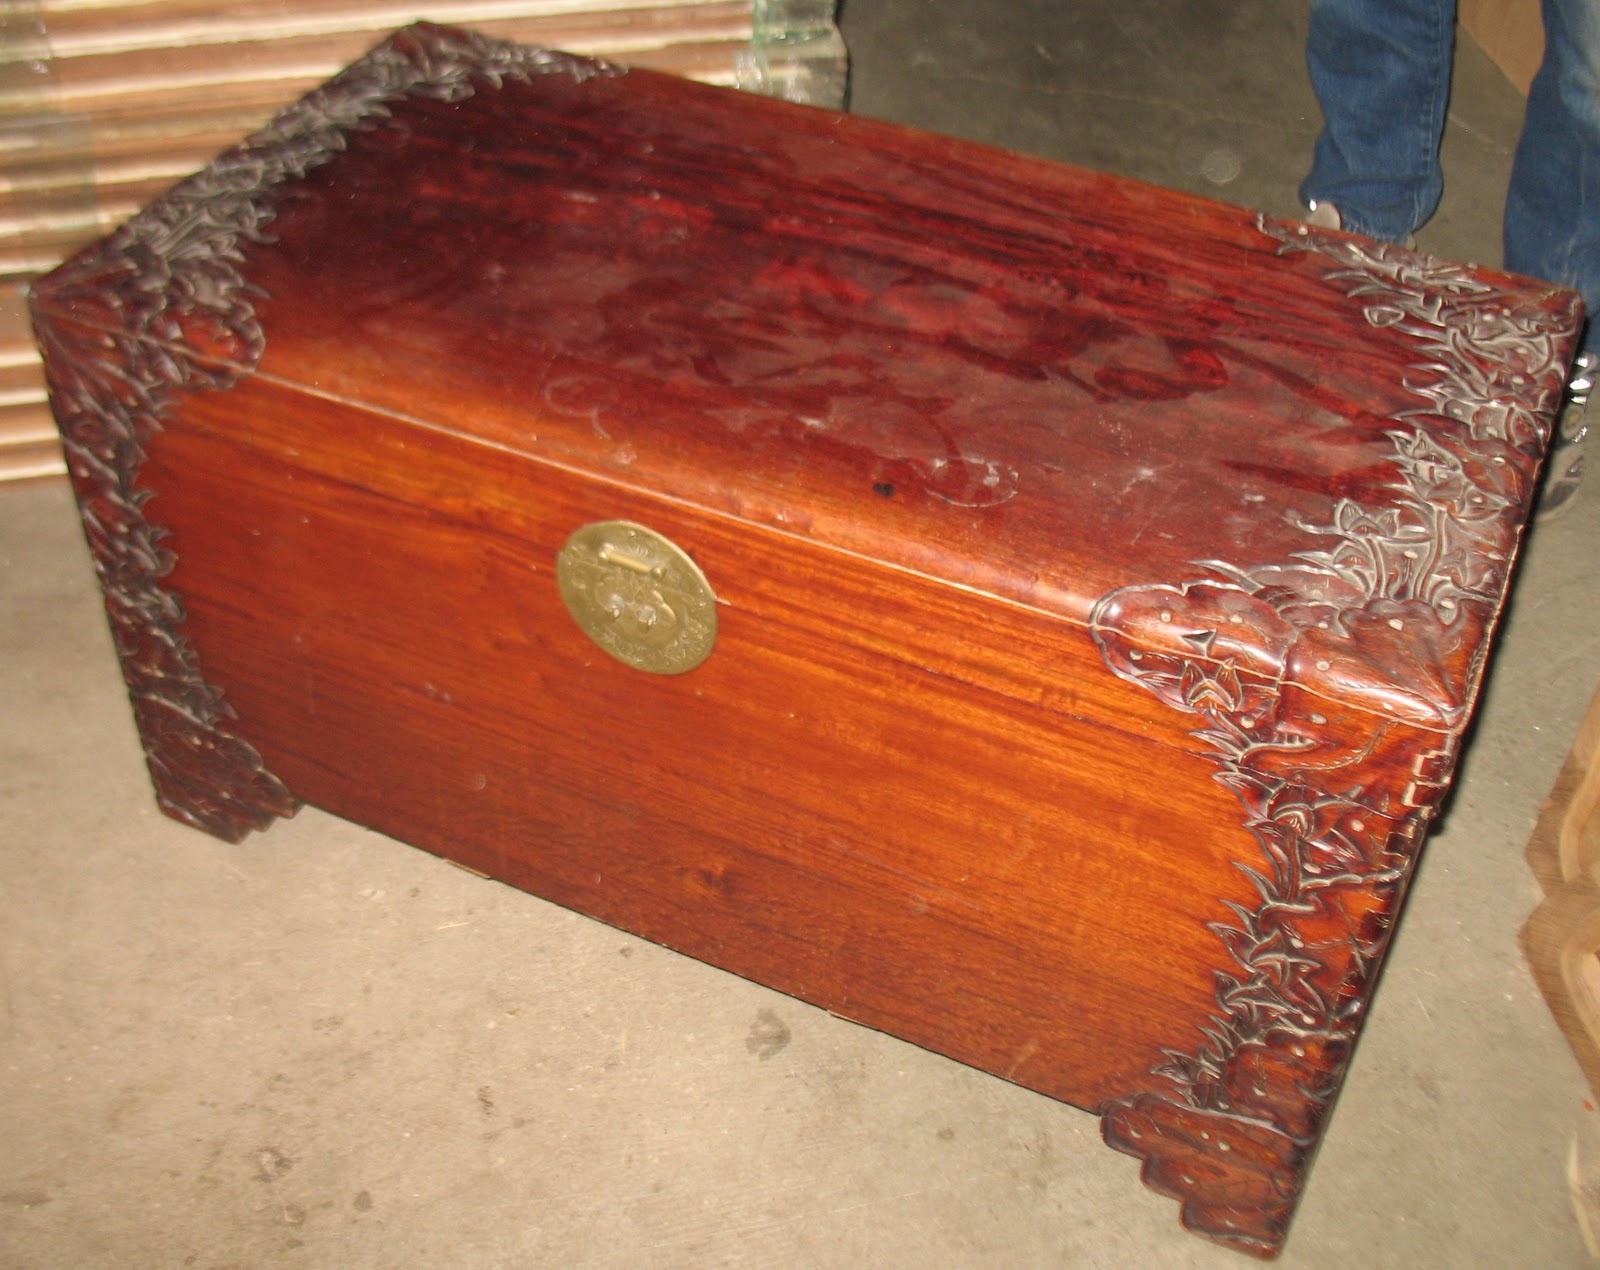
This beautiful chest just left our shop today, I am glad I got pictures of it before it went!  It came to us with just a few problems,  the first issue we had to deal with is that the top panel of the lid had shrunk.  It was the correct size side to side, but small front to back.  Because of all the intricate carving it would have been extremely expensive to add wood and carve to match.  Instead we agreed to move the panel forward so that there was no gapping on the front, and then we colored the bare lip on the back so that it blended with the rest of the lid.

Our next step was to clean and wax the entire exterior of the chest.  In had some discoloration to the wood, where patches were lighter in color then the rest,  and there was some odd whiteness in the carving.  We still don't know what caused that or if someone at some point did it on purpose.  But the Georgian Mahogany colored wax got rid of all of those color problems and gave the chest a gorgeous deep sheen.
 The interior of the chest was very dry when it came into our shop.  Not only did this do nothing for it's beautiful wood grain, but dry wood also brings a host of other problems.  When the wood is dry, it is more susceptible to cracking and breaking, as well as shrinkage. (hmmm, could this have lead to that top shrinking?)  Also, the pores are more open which means that they can catch moisture born issues and various molds.
We used two coats of Tung Oil on the interior of the chest which fixed the 'dry' problems and also brought out the gorgeous wood grain patterns.  I almost think this trunk should just be left empty so that the marble pattern on the bottom can be properly displayed and admired!  I know that will not happen so instead we can all just admire it in this picture.

Our customer was thrilled when she saw the finished result.  It is reactions like that, that make our work so satisfying.  We love a happy customer.

Wednesday, July 20, 2011

New Gilding on a Refurbished Coffee Table

 This is something we don't talk about all that often on this blog,  Gilding.  I suppose that is because we don't to it all that often!  This coffee table belongs to a set with an end table and two lamp tables.  This one is the only one with gilding though, so it got some special treatment.  I don't know if you can see very well from this first picture,  but the gilding has turned yellowish and is peeling off all over the place.  


After we refurbished the 4 pieces from the set, we applied a gilding paste to the accents on the carved decorations.  The paste is made out of metals of different colors that resemble various precious metals.  So this isn't real gold on the table, no guests will  be make a profit by flaking it off!  But it looks pretty good doesn't it?

The craft of gold leaf gilding in which leafs of gold are applied to objects for ornamentation, goes back over 4,000 years to Northern Africa where gold foil was applied to wood to give the appearance of being made of solid gold. Some of the finest gilding, however, took place in early 18th century France when Louis XIV desired to show his power through the gilt works of his time, establishing France’s leadership in the decorative arts.